
Why your spine width changed when you did not touch the cover
Spine width is not a design decision. It is page count multiplied by the thickness of one sheet of your chosen paper. Add a chapter, switch from cream to white, or change binding after generating your template, and the spine changes width. Because the spine sits between the front and back panels, everything moves with it, which is why a cover you never edited suddenly fails.
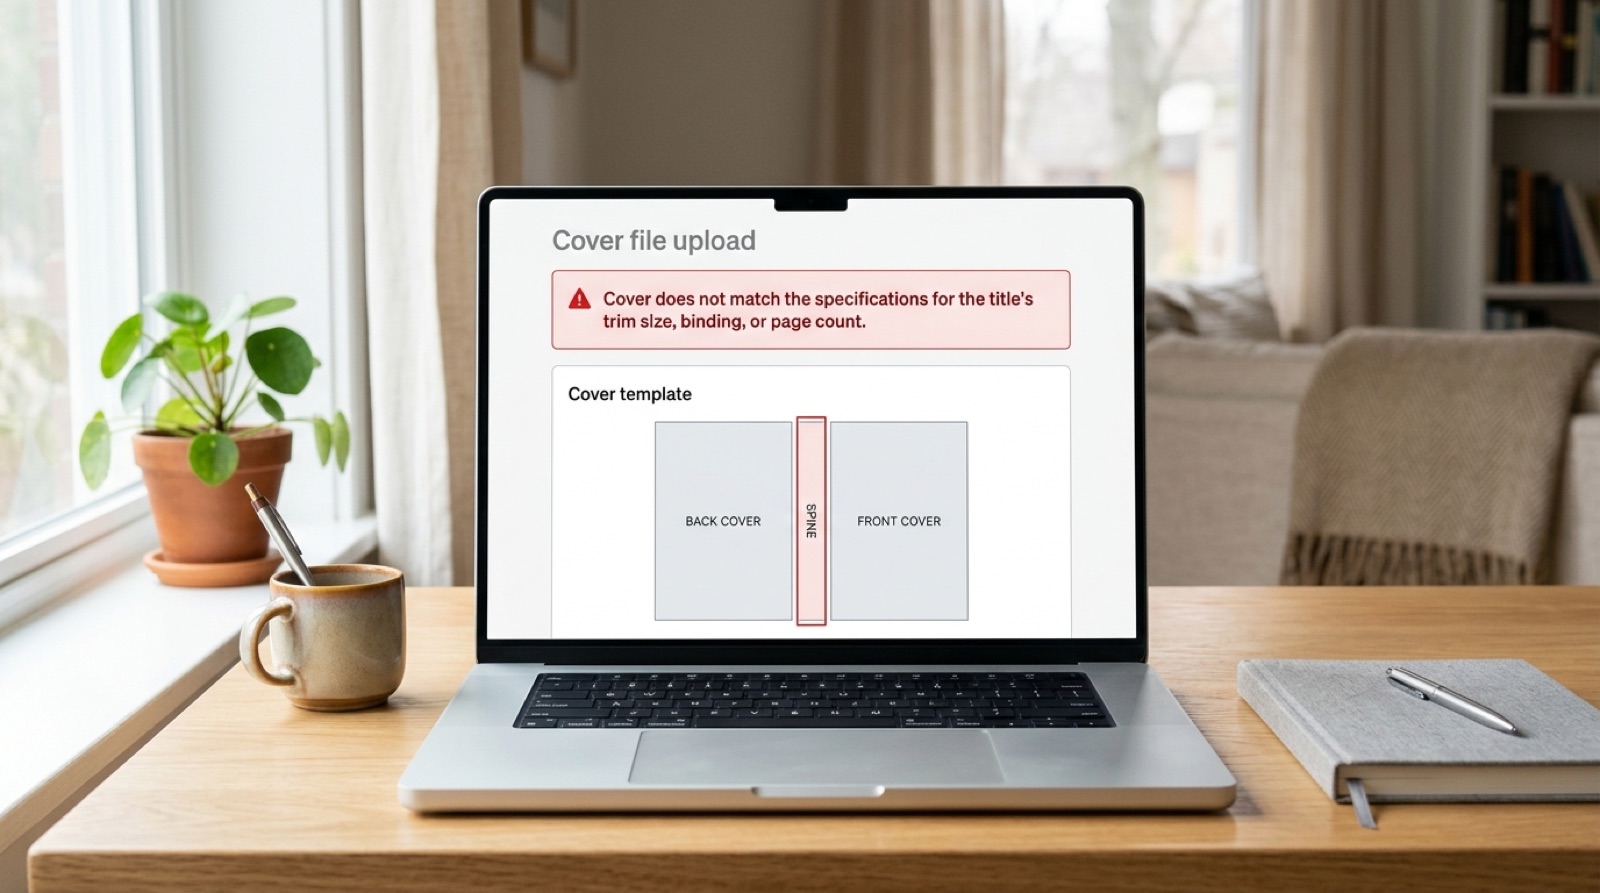
Cover does not match the specifications for the title's trim size, binding, or page count.
This is the most common cover rejection in print-on-demand, and it is also the one authors most often try to solve by nudging artwork in Photoshop. That approach cannot work, and understanding why takes about two minutes.
The math
A printed book's spine has to be exactly as thick as the block of paper inside it. So the calculation is simply:
Spine width = final page count x thickness of one sheet
White 50lb paper: pages x 0.002252 in
Cream 50lb paper: pages x 0.0025 in
A 300 page book on cream stock: 300 x 0.0025 = 0.75 in.
The same 300 pages on white stock: 300 x 0.002252 = 0.6756 in.
Those two numbers differ by roughly 0.074 in on an identical manuscript. That is far outside any printer's tolerance. Changing nothing but the paper dropdown is enough to invalidate a finished cover.
Why the whole wrap moves, not just the middle
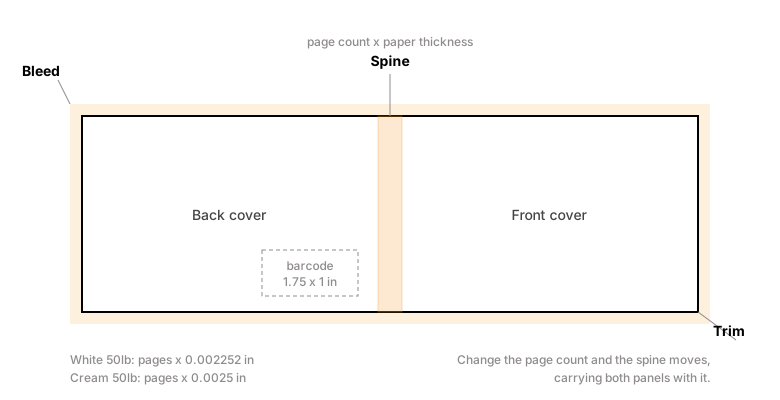
A print cover is not three files. It is a single flat sheet containing back cover, spine and front cover, printed and then folded. The fold positions are determined by the spine width.
If the spine grows by an eighth of an inch, the total wrap gets an eighth of an inch wider, and both fold lines move outward by a sixteenth. Your front cover artwork is now offset from where the fold will actually fall. The title creeps toward the spine, the back cover text drifts toward the edge, and the barcode clear zone lands somewhere it should not. None of that is visible when you look at the file. It only appears when the press folds it.
What changes the spine without you noticing
- Adding or removing any content: a new dedication page, an extra chapter, a longer acknowledgements section. Books also have to have an even page count, so adding one page often adds two.
- Changing paper stock, cream to white or standard color to premium color. The multiplier changes.
- Changing binding. Perfect bound, case laminate, dust jacket and jacketed case laminate all wrap differently.
- A font or type size change in the interior, which is the one that catches people out. Substituting a body typeface reflows the text and can move the page count by several pages. If you changed a font to fix an embedding error, check your page count before you touch anything else. See fonts are not embedded.
- Editing after the cover was designed. Late proofreading corrections that add or remove a line can cascade into a new page.
Why nudging the artwork does not fix it
The instinct is to open the cover file, shift the front panel a little, and resubmit. It fails for two reasons.
First, the overall document dimensions are wrong, not just the placement. A wrap built for a 0.6756 in spine is physically narrower than one built for 0.75 in. Moving objects inside a canvas that is the wrong size does not make the canvas correct.
Second, the printer is not comparing your artwork to its template by eye. It is checking the file's trim dimensions against the numbers it calculated from your metadata. If those do not agree, the file is refused regardless of how the artwork sits.
The correct sequence
Order matters more than anything else here, because every step depends on the one before it.
- Finish the interior completely: all editing, all proofreading, all corrections. The page count must be final.
- Lock the specifications. Write down the trim size, binding, paper stock and page count.
- Generate a fresh cover template from the printer, using those exact values. Do not reuse an older template.
- Build or rebuild the cover to that template, with bleed on all four outer edges and the barcode area left clear.
- Confirm the metadata in your printer account matches the template you built to. A mismatch anywhere in trim size, binding, interior type or page count is an automatic rejection even when the artwork is perfect.
The rule that prevents most of this: the cover is the last thing you finalize, not the first. Design it early if you like, but do not build the production wrap until the interior page count cannot change again.
Two platforms means two spines
If you publish through both IngramSpark and KDP, you need a separate wrap for each. The per-page multipliers are similar, but each platform generates its own full wrap dimensions and applies its own bleed conventions, so the templates are not interchangeable. The full comparison is here.
If you are already several rejections deep
Spine problems frequently arrive tangled with others, because the same late edit that changed the page count may also have introduced an image below 300 DPI or pushed a running head outside the safe margin. The printer will report whichever it hits first. Why your file was rejected a second time explains that pattern.
Frequently asked questions
How do I calculate book spine width?
Multiply the final page count by the thickness of a single sheet of your chosen paper. White 50lb paper is about 0.002252 in per page and cream 50lb is about 0.0025 in per page. A 300 page cream book gives 300 x 0.0025 = 0.75 in. Always generate the template from the printer using your exact specifications rather than calculating by hand.
Why did my spine width change when I did not edit the cover?
Something changed in the interior or the specifications. Adding or cutting pages, switching paper stock from cream to white, changing binding type, or substituting a body font that reflowed the text will all move the page count or the per-page thickness. Either one changes the spine, and the spine determines the whole wrap.
Can I just resize my cover to fix a spine width error?
No. The overall document dimensions are wrong, not just the placement of the artwork. A wrap built for a narrower spine is physically a different size, and printers check the file's trim dimensions against the numbers calculated from your metadata. You need a fresh template and a rebuilt cover.
Does changing from cream to white paper really matter?
Yes, and by more than people expect. On a 300 page book the difference between cream and white stock is roughly 0.074 in of spine width, which is far outside printer tolerance. Lock your paper choice before the cover is built, not after.
When should I design my book cover?
Design it whenever you like, but do not build the production wrap until the interior is completely final. The cover is the last file to be finalized because its dimensions depend on a page count that any late edit can change.
Stuck on a rejected file?
File Fix diagnoses every reason your file was refused, not just the one the printer named. Diagnosis back in three to five business days, from $99.
Get your files fixed